


null
🕰️ LC701 Time Art Romantic Notes Wall Clock – 3D Wooden Puzzle ⏳
🕰️ LC701 Time Art Romantic Notes Wall Clock – 3D Wooden Puzzle ⏳
- Perfect Gift
- Premium Quality
- Educational
No se pudo cargar la disponibilidad de retiro
Notice
Wax is not included if shipped from China. Due to customs restrictions,can be replaced by candle.
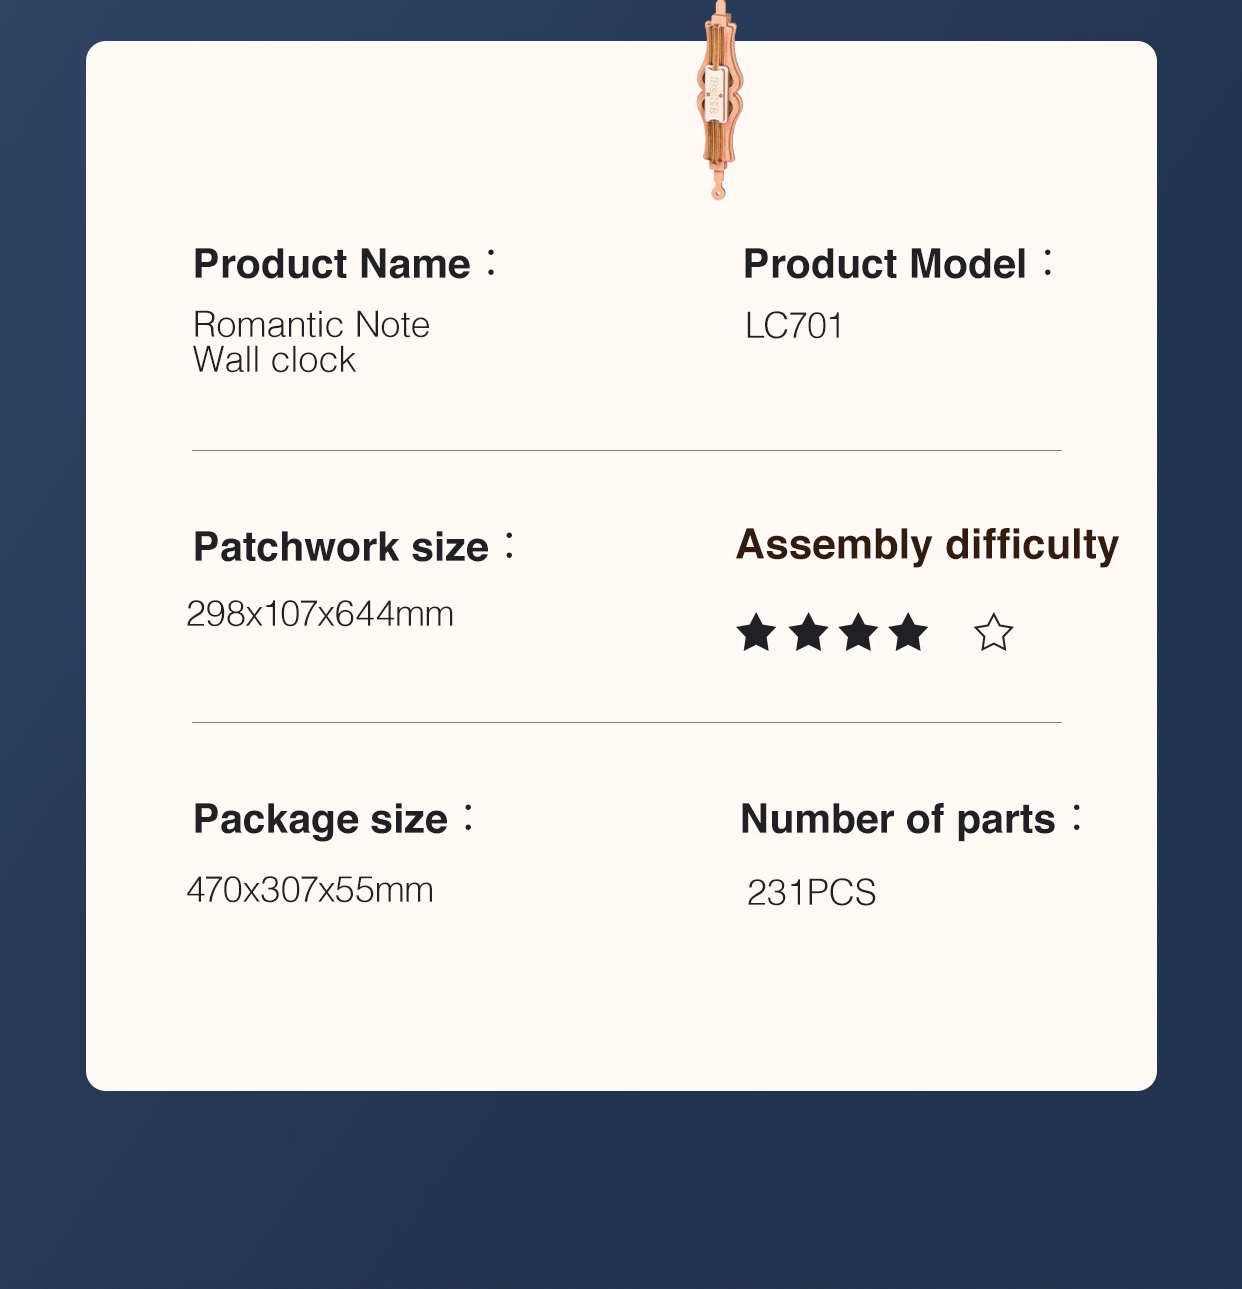
Product Information
Brand:AX-Woody original design;
Wood piece: 231pcs;
Assembly time:about 4 hours.
Recommend age:14+,children under the age of 14 can complete the assembly accompanied by their parents.
Certificates:EN71,CE,FSC,FCC;
Weight:1500g;
Assembly Size:298*107*644mm
Package size:470*307*55mm
Product Show


Customer Reviews
Building this clock was extremely enjoyable... probably because it all worked at the end! Relatively speaking, this isn't a difficult build, it only has 231 pieces. All of the pieces fit well together. To me the most important part was getting the pendulum to move, because that is what differentiates this clock from others. Alot of people have had difficulty getting the pendulum to constantly move or to move at all. The clock's time is run by a battery operated quartz movement separate from the pendulum. I was determined to get the pendulum to work. After finishing the build you need to hang the clock on a wall to do all adjustments. The kit gives several options but I used my own 3M command strips. 1. Of course waxing all gears throughly was of the upmost importance. 2. After hanging the clock, you need to make sure the clock is level. There are adjustment screws that you build into the clock for this. 3. You can adjust the center of gravity also, if needed. 4. You will need to add 300gm - 450gm of weight into the counter weight. I started with 300gm and eventually added about 30gm more. I used metal washers that I had lying around, but anything that fits will work (nothing is included in the kit for this). After about 1 hour of adjustments including adding more washers to the counter weight, the pendulum moved... and continued to move. The counter weight is what makes the pendulum swing back and forth. After some time (about 2 hrs in my case) you need to reset the pendulum. The length of the string attached to the counter weight determines the length of time the pendulum swings without a reset. The kit also gives you a way to stop the pendulum swinging mechanism. BTW, the clock is silent except for the clicking of the pendulum swinging. All in all a very, very satisfying build!
Great product
comme passe temps ,tres bonne facon de s`amusé et tres intéessant a assemblé ,j`adoré l`assemblé .
This was my 6th Rokr project, the second and my last of their clocks as neither of them functions as depicted. I wanted to try this clock for the charm of the ticking sound and movement of the pendulum and weight however the escapement wheel and pendulum do not work continuously. The longest I have been able to get mine to work is 14 minutes and that was after making numerous adjustments. After reaching my wits end I reached out via email to customer service for advice and was greeted, much like the clock, with silence. The battery clock operation works fine and it's a pretty timepiece just don't buy it expecting to enjoy the sights and sounds of a pendulum clock.
I spent 3 "sessions" building this clock. I didn't actually time it. I used a white padded work surface (the back of a table runner), tweezers, a magnifier with led lights and put everything away between sessions to keep the kitties from distributing parts all over the dining room.The pieces are laser cut with very small uncut bits within the larger piece of wood ("the support structure"). You need to have a finger and thumb on the seam between the part and the support structure when breaking the pieces out - see picture. That minimizes splintering - also don't try to pull a part lose at an angle. Make sure that the part is pushed through its support structure such that the face of the part and the face of the support remain parallel to each other.Any damage to the colored veneer can be repaired with the tiniest drop of superglue and some tweezers.I'm retired so I could spend the time to do this carefully and assure that everything was done correctly testing that the gears meshed correctly and moved smoothly as I built it. Don't do this in a rush, and be willing to walk away for a while if you start to get frustrated with the fit. Wax EVERYTHING. It all goes together better if the tabs that are going into slots are waxed first.I was thankful for the extra duplicate pieces of the more delicate parts although I only broke one piece.I own several antique clocks and reading some of the reviews I realized that the physics behind the weight and counter balance mechanism was not understood. By the way, I used BBs (like for a bb gun) inside a ziplock type bag for the weight. The weight and counter balance are necessary to get the pendulum and gears to move correctly. If the pendulum movement was actually what was keeping time, pulling the counter balance down would be how you would "wind" the clock and the weight would move the gears which would be moving the second hand, which would move the minute hand which in turn would move the hour hand. As time passed, the weight would move down and the counter balance would move up and pulling the counter balance down would again wind the clock.I have cats, so I will need to build a case with plexiglass panels for the entire clock so that they can't play with the weight and counter balance pieces. They would most certainly pull it off of the wall. It will keep the dust off of the gears too. The manufacturer should add a case as an add on purchase! I would buy it.This was fun! I wish it was a "real" pendulum clock with a chime, but it was well worth the effort. It is by far the best Christmas gift of 2024!!
